Explorations
1. Ink
Two or more class periods
Just like the stuff in your pens, ink is that and so much more. In this Exploration you will practice drawing with ink with what's called "pen and ink", a quill that's dipped into ink to draw with and with ink washes that are done with a brush. Read and follow steps A through D, remembering to save your work to show your learning.
Care and Use:
Make sure to wash ink from both quills and brushes, dry with paper towel and put away in the "ink" area in the drawing center. Brushes should be stored with bristles up, ink containers must have lids on so they don't dry out.
Care and Use:
Make sure to wash ink from both quills and brushes, dry with paper towel and put away in the "ink" area in the drawing center. Brushes should be stored with bristles up, ink containers must have lids on so they don't dry out.
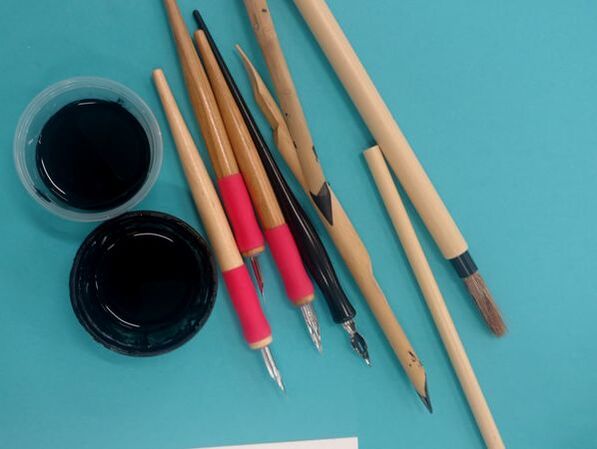
A. Get two types of quill to try, ink, a brush and thick paper to use from the ink area of the drawing center. These are the ink materials available in the room. Find them in in the drawing center in the cabinet labeled "ink". We have three different types of quills; two plastic with metal nibs and two sizes of bamboo. We also have brushes that can be used to apply ink as it is or with added water to make a wash.
|
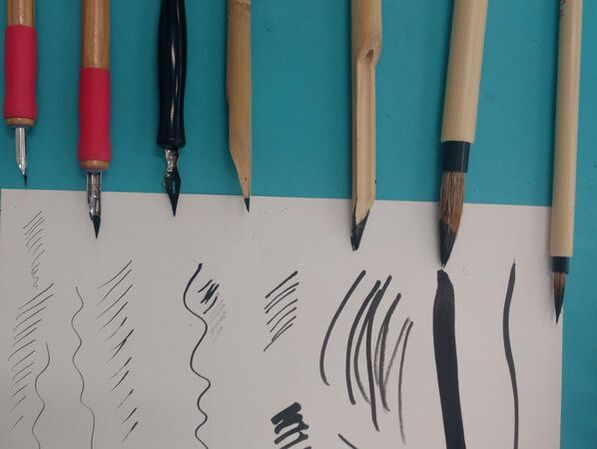
B. Try experimenting with the marks each type of tool. Which ones do you prefer for small detail? Which ones for making larger marks?
|

C. Try using marks to create value. These techniques, from left to right, are hatching, cross hatching, scumbling and stippling. The closer marks are to each other, the darker the value. Draw four spheres of your own, like the ones above, and a fifth with an ink wash. Or try each technique in a different way, as long as you experiment with making value.
|
D. Find inspiration and create your own work.
- Go to Pinterest and search "pen and ink" drawings. Make a board with 10 ideas you like. These are for inspiration, not to recreate. - Create your own drawing that fills a sketchbook page and shows how you applied your learning. |
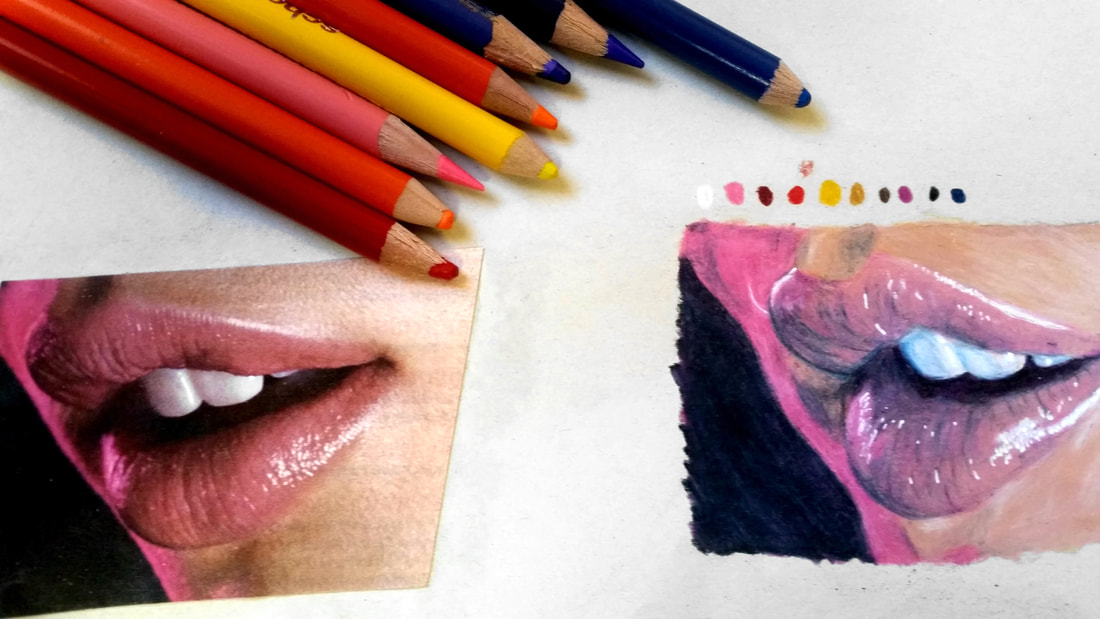
2. Colored Pencil
Two or more class periods
Colored pencil drawing can take time but it gives the artist lots of control. Often, people don't know to go beyond a quick, one layer coloring with this media, however building up drawing through layers of color can produce amazing results. Read and work through each step to learn some methods for using colored pencils.
Care and Use:
Sharpen with handheld sharpeners and make sure to put pencils back with the correct color group and brand. We have two types of colored pencils in the room: vnvnv and prismacolor. X are harder to blend but less expensive. After you have gone through this exploration you can try to use the prismas if you'd like to continue with colored pencil.
A. Gather supplies.
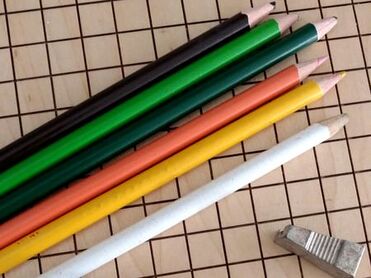
For part B, you will need green, yellow, white, blue and brown. Use a hand held sharpener to sharpen colored pencils. *We're kind of short on blue colored pencils right now, so we'll have to share. |
B. Draw three spheres along with the tutorial.
After the first sphere, can you try the next two with different local colors? Could you try another color in the shadows? Make sure to be able to show me where you've build up to burnishing. |
C. Magazine Challenge.
Select an image from one of the magazines in the shelves by the courtyard windows. Cut it out, glue it in your sketchbook, then try to draw it (you can sketch very lightly with pencil if needed). Think about how to blend and layer to get the colors and textures you need. |
D. Find inspiration and create your own work.
What will you draw with colored pencil? You could work from a photo, create from your imagination or something in between. Whatever you decide, plan your composition (where things are on the paper) by creating at least 6 thumbnail sketches. Once you've decided on a composition, create your work using the techniques you've learned. |
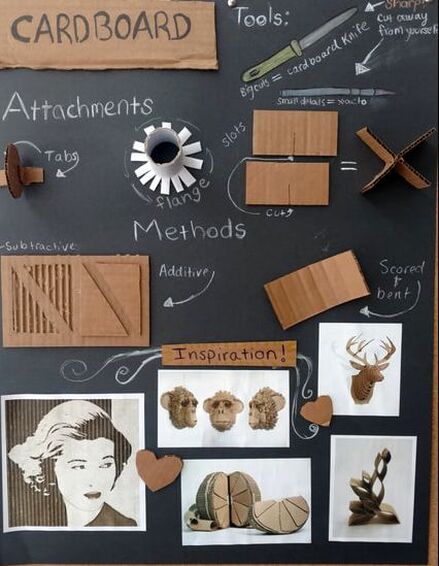
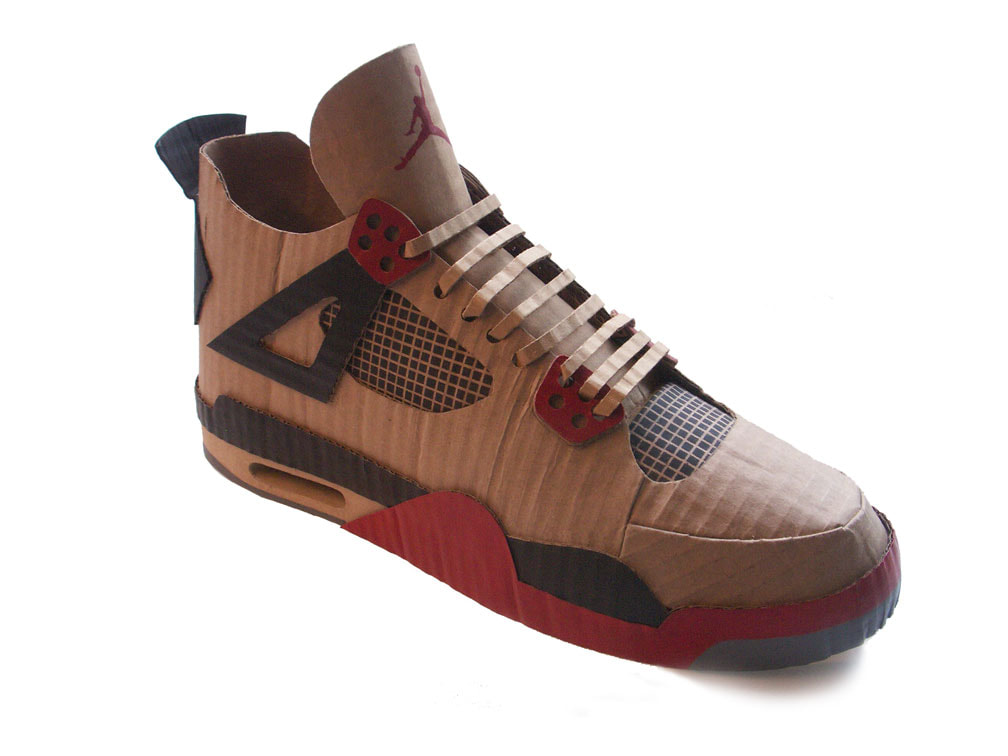
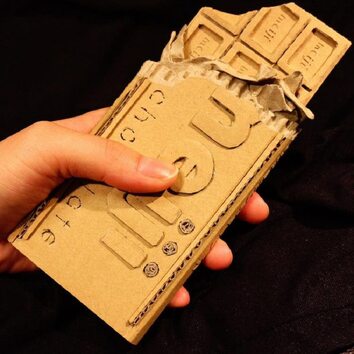
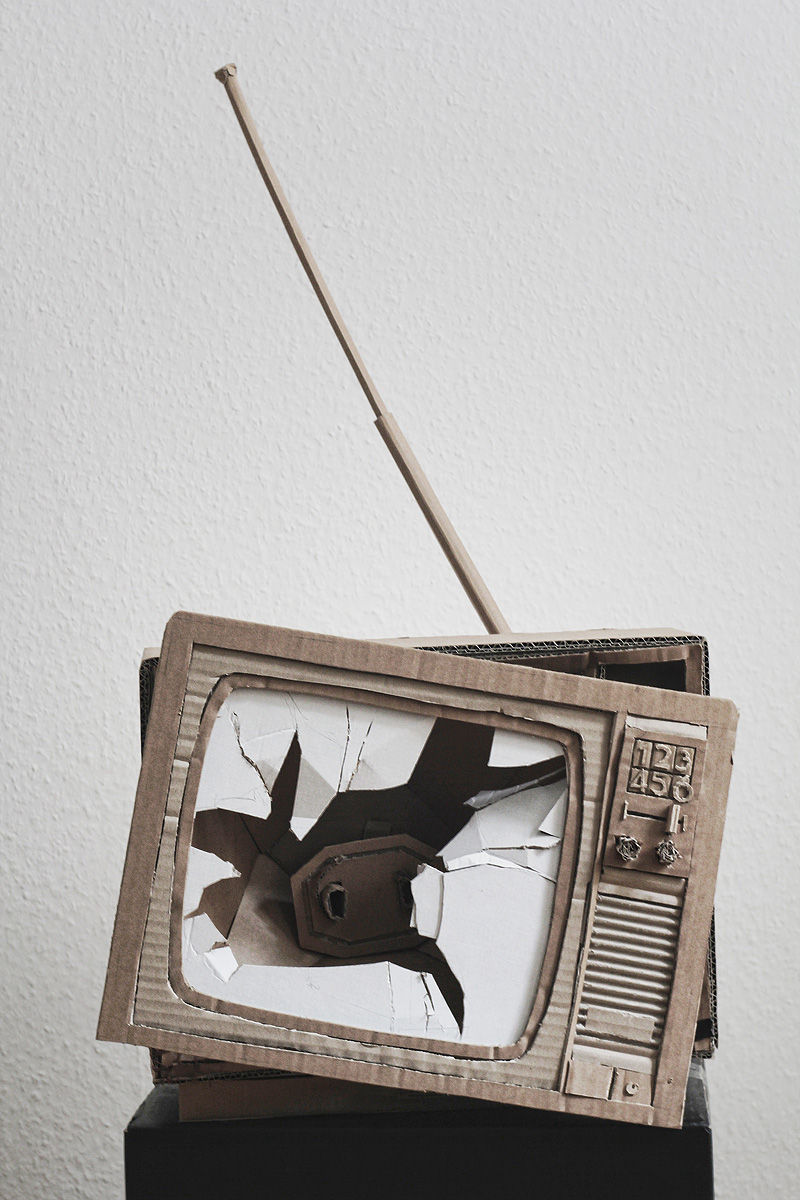
3. Cardboard
Cardboard is both fun and challenging to work with. It can seem like more of a moving supply than a fin art medium, but contemporary artists do amazing work with cardboard and you can too. Try this exploration alone or in a small group - your choice.
Care and Use:
Get cardboard from the sculpture center, along wall where the supply closet is. Make sure to be safe with cardboard tool, which can cut you if you are not careful. Always cut away from yourself. I have protective gloves available to wear when using cardboard knives. If you get hot glue on your skin run the area under cold water.
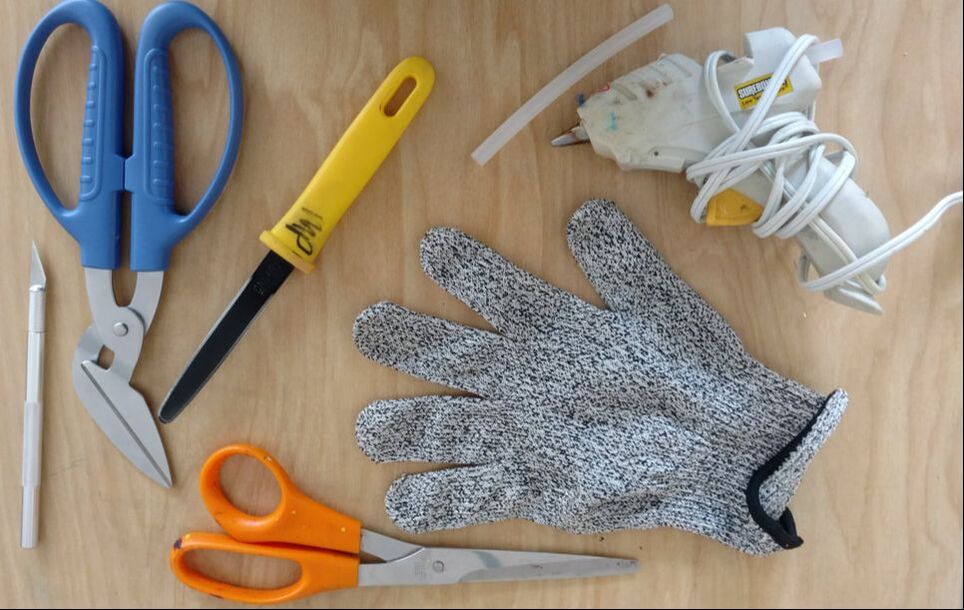
A. Gather supplies.
Cardboard knives, cardboard scissors, hot glue and safety gloves can be found in the sculpture center. Scissors can be found in the drawing supplies and tools center. Ask me if you need an x-acto knife. B. Try it out.
Using the poster at the cardboard center, figure out how to make a structure that: - is at least 6 inches high (12 if you are working in a group) - uses 3 techniques from the poster - can hold the weight of your sketchbook. - no tape |
|
C. Find Inspiration and Create.
Check out the artists whose work is linked below. As you look at their work, think about ideas for your own cardboard art. Once you've developed an idea, share it with me, then get to work.
Check out the artists whose work is linked below. As you look at their work, think about ideas for your own cardboard art. Once you've developed an idea, share it with me, then get to work.
4 Collage
|
College is a modern art-making method that involves finding, assembling and repurposing existing images. It's fun and can be anything from light hearted to deep and meaningful.
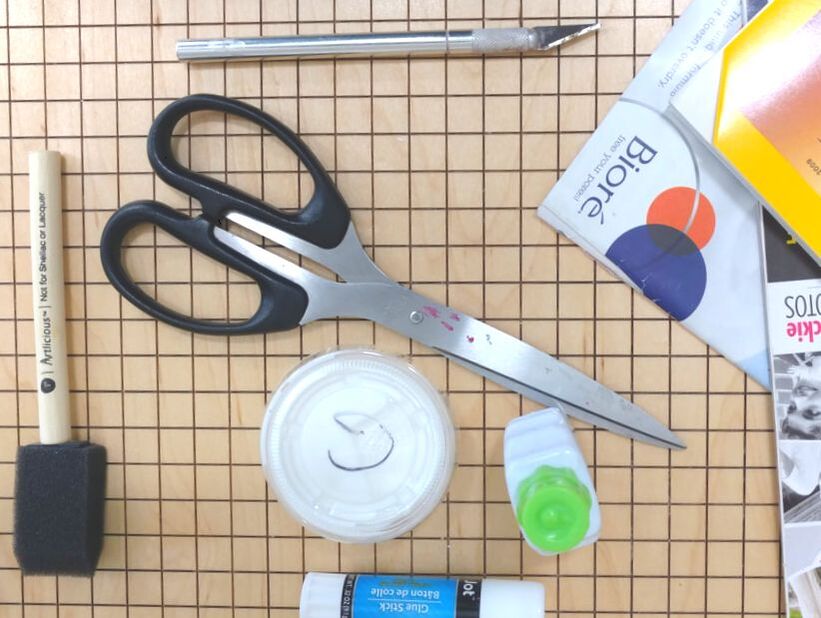
A. Gather materials. These located in the cabinet labeled "collage", as well as in the tool drawers below. X-acto knives, used for cutting fine details, are available if you ask me. |
|
B. Try it out - after checking out some examples.
- Cut out or tear images you like from magazines or print images you need.
- Glue images to the paper with a glue stick.
- Try adding cut out drawing or text or even sewing with thread.
- One everything is added, cover it with a thin layer of gel medium, applied with a foam brush.
- Once your work is dry it can be drawn or painted over and more collage layers can be added.
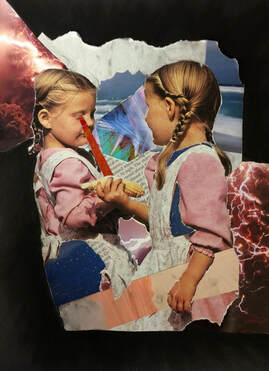
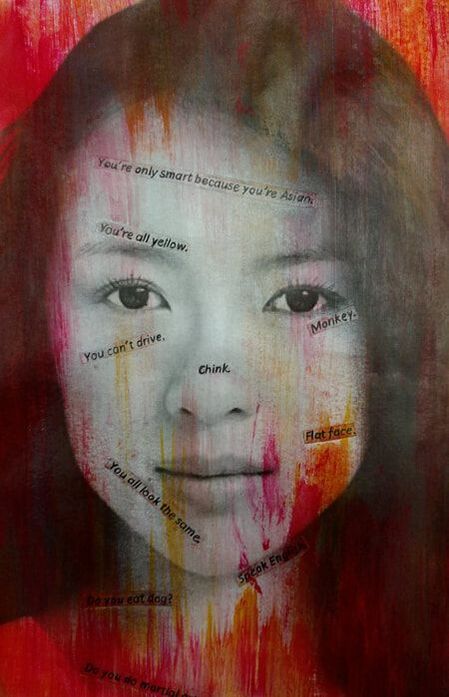
C. Group discussion. (done with the class)
These two images, both collages made by Art 1 students, are very different. What do you notice about the work? What do you think each artist wanted to say?
These two images, both collages made by Art 1 students, are very different. What do you notice about the work? What do you think each artist wanted to say?
|
|
D. Try it out!
Make a collage or a collection of collages that show your learning and skill.
Make a collage or a collection of collages that show your learning and skill.
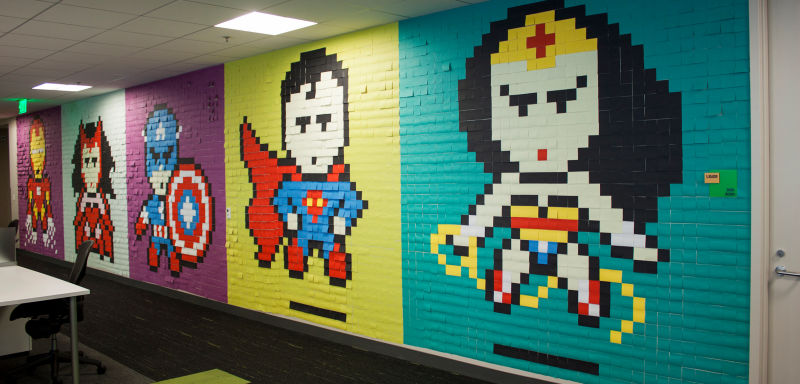
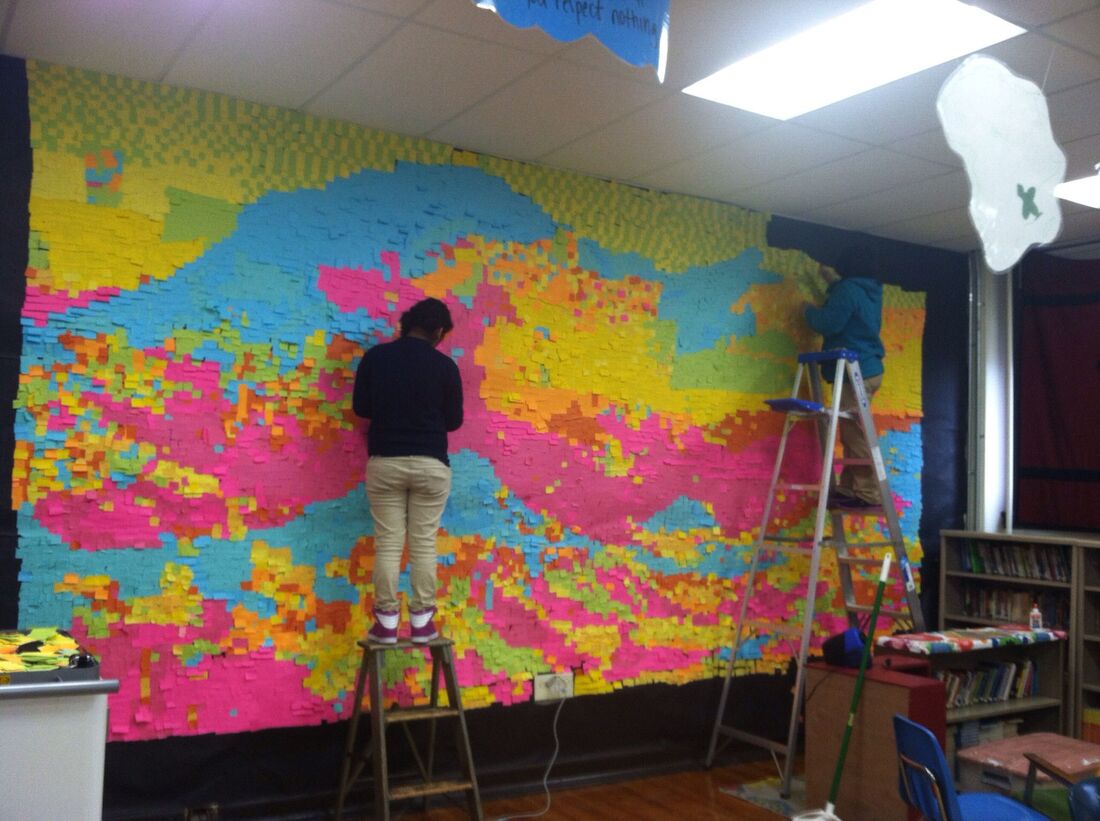
Sticky Note Mural
A. Research
Check out some of these examples and come up with an idea. You will plan in step B.
Check out some of these examples and come up with an idea. You will plan in step B.
|
|
